A pillow fort is more than just a soft and cushy cocoon, it’s the perfect family activity for a rainy or freezing cold day, offering guaranteed fun for both the young and young at heart.
With a lot of room for creativity, building a cozy hideaway provides a great distraction from the usual household hubbub. It offers a peaceful haven for snuggling up to your kids for story time, or for a quiet nap, a board game, a movie or a night of camping in the living room.
Who knows what your kids will dream up to make the most of this comfy lair!
The Essentials To Build Your Fort
A family-made pillow fort can be any shape or size. However, using certain basic materials can minimize the risk of the fort caving in while you’re enjoying your retreat inside. Here are some tips for a winning fort structure to create with items from around the house!
1. Choose the location:
Your pillow fort’s location is important. You should start by choosing a large piece of furniture – such as a couch – that you can use as the main support for your structure. You should also think about things like light, surface, and comfort. Once the location has been determined, the construction of your fort can begin!
2. Install the Floor:
- A mattress (inflatable?) – Can maximize comfort or add to the camping effect.
- Pillows – The more, the cushier!
- Comforter or thick blanket – For adding a second layer to the pillowy floor and for snuggling up to your heart’s content.
3. Make the Walls:
- Chairs – Kitchen chair seats can be instrumental, providing height and sturdiness to the fort.
- Pillows – The fort’s key component; perfect for plugging gaps in the walls, a bit like the concrete in a brick facade.
- Sofa or other piece of furniture – Often constructed in the living room, a pillow fort has everything to gain from having the sofa, a table or another piece of furniture as a solid base for its structure.
- Cushions – Sofa cushions are typically firm and large, making them ideal for creating internal walls and a plush decor, and great for camouflaging the chairs.
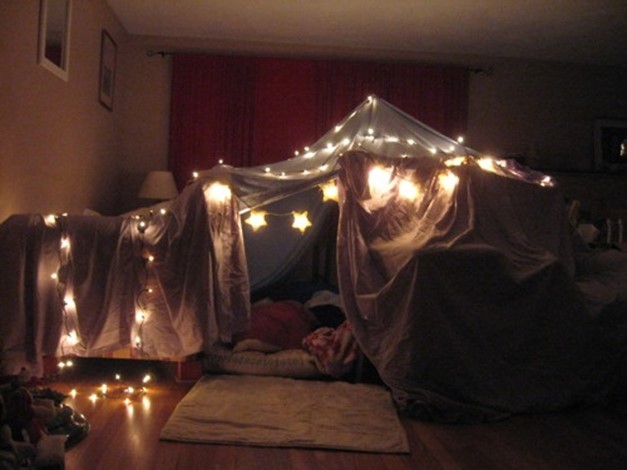
3. Build the Roof:
- Light Sheets – Lightweight and flexible, a fitted sheet can be just the thing for creating a roof.
- Blankets – The thickness of a blanket adds to the fort’s safe, cocoon feel.
- Weights – A heavy book like a dictionary or other safe object for holding the corners of the roof cover in place. Clothes pins can also come in handy!
- Peaked roof – If there’s an existing hook or solid beam on the ceiling in the room, why not attach a string to the roof of the fort and create a big tent-like effect!
The Final Touch to the Ultimate Pillow Fort: Creating Ambiance!
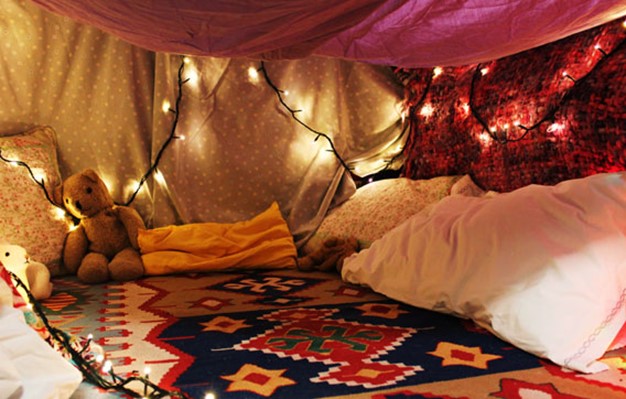
What sort of vibe do you want to create with your family? White lights filtered through a white bed sheet to create a subdued effect and a wonderfully relaxing atmosphere? A pitch-black cave perfect for movie-watching? A colourful den lined with Christmas lights and bright seat cushions?
A pillow fort is an inexpensive DIY project that is fun to create and provides a safe, creative and inviting space where you and your family can enjoy each other. Pillow forts are great for kids of all ages and provide an opportunity for creativity, imagination, problem-solving, and learning.
The family activity options are endless, and your clan can enjoy hours of fun before, during and after building your comfy pillow fort!
Looking for other activities to do with your family? Check out our articles Family activities that will take you outside or 5 rainy-day family activities and share joyful moments with your children!